Hario “Mizudashi” Cold Brew Pot Review
With Kansas City heat still blasting us well into August, cold brew is the go-to afternoon beverage around here. On a whim, I decided to check out a product from Hario -trusted manufacturer of the V60 dripper- that looked promising: the Mizudashi Cold Brew Pot. After trying a few brews, I thought I’d share my findings and thoughts and help people looking for a way to make some great cold brew at home. So, here’s an objective review of the Mizudashi brewer from Hario!
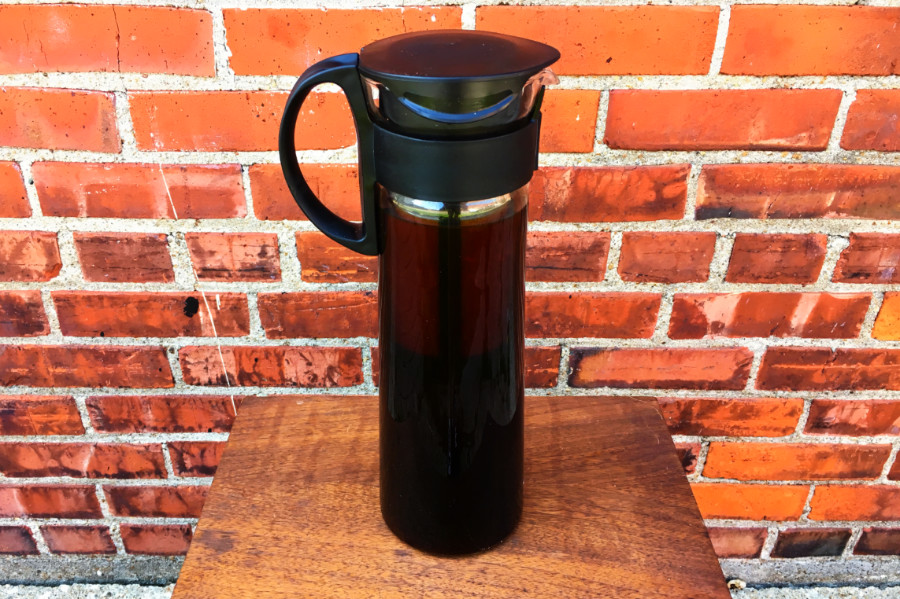
Unboxing/Appearance
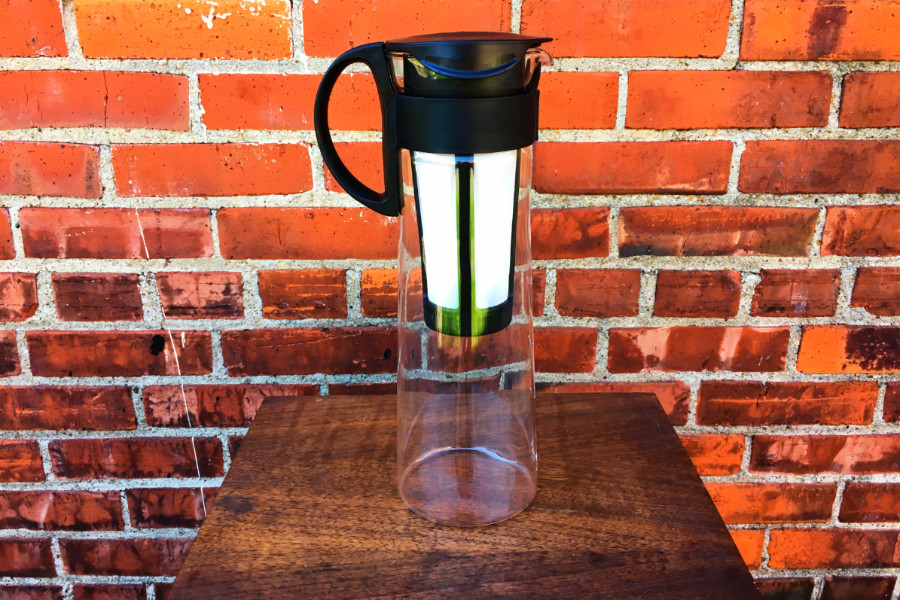
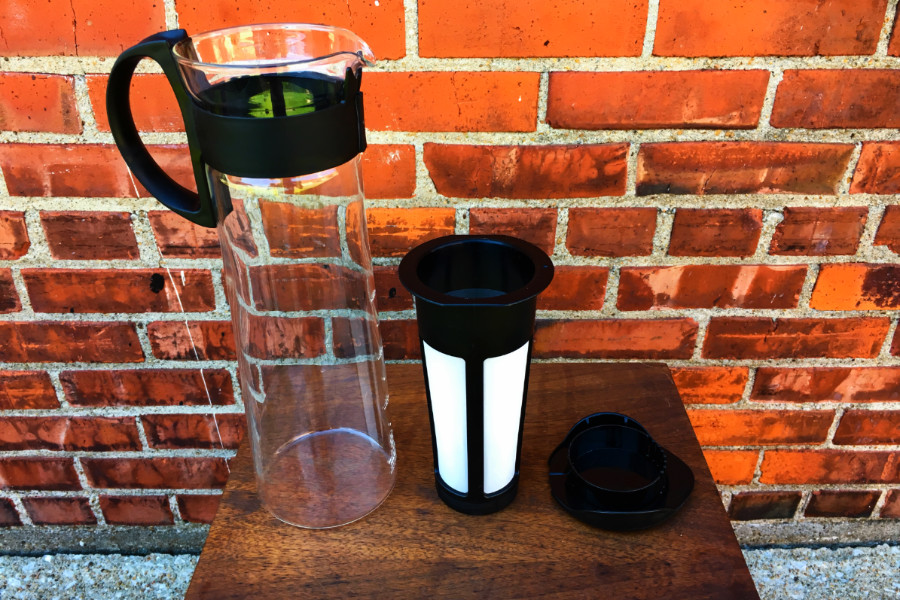
The first thing that’s apparent about the Mizudashi is how simple it is. With basically just 3 parts -4 if you count the detachable bottom of the filter- it has a clean and uncluttered appearance, and you can tell just by looking at it that the brewing process won’t be complicated. My only complaint would be that next to Hario’s products trimmed with gorgeous olive wood or the classic Chemex, it looks a bit cold and plain. Perhaps they’ll release a version in the future with an olive wood handle…
Build Quality
While the Mizudashi seems to be made well enough, the combination of a glass carafe, plastic handle and very fine nylon mesh brewing chamber mean that this item should be handled carefully and probably hand-washed. I’m sure the choice of materials helps keep the cost as low as it is to make the brewer accessible to lots of people wanting to dip their toes in the cold-brew pool… so to speak. Just take care while cleaning and transporting and you should be fine!
Ease of Use
This is where the Mizudashi really shines. It couldn’t be easier to make great-tasting cold brew. You just grind your coffee, add it to the brew chamber, and slowly fill the carafe with water until the coffee is submerged. When it’s done brewing, you pull the chamber out, dump the grounds and throw the carafe in the fridge. Done.
Hario recommends using 80 grams of medium-fine ground coffee for a full 1000mL pot and brewing in the fridge for 8 hours. I found this didn’t produce the flavor profile OR brew strength I look for in great cold brew, so I did some experimentation and found a recipe that makes a strong, sweet and complex batch of cold brew that is not only refreshing but invigorating! Here’s my method, outlined below.
Mike’s Mizudashi Cold Brew Method
Start with 110 grams of medium-coarse ground coffee.
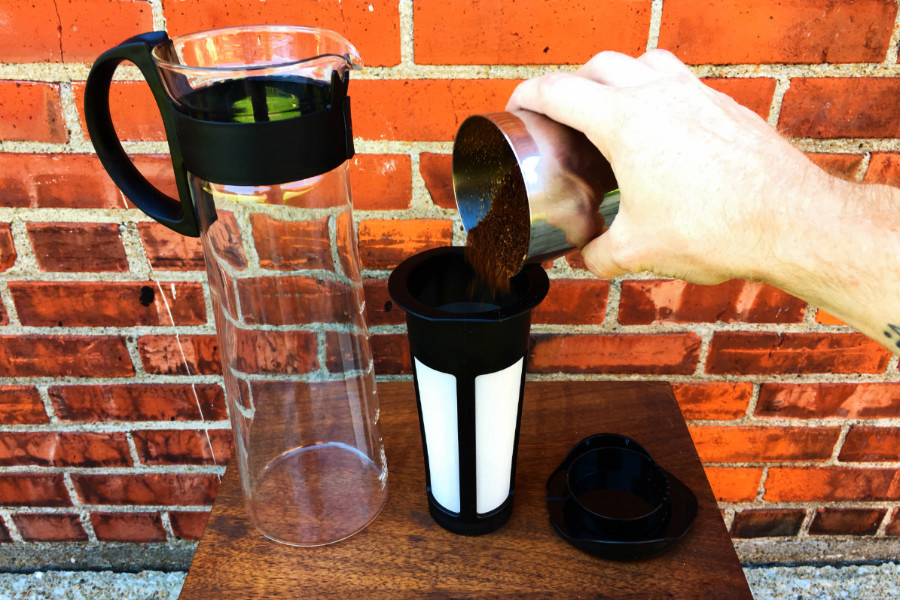
Our go-to coffee to water ratio for cold brew is 1:9, so for a 1000mL batch of cold brew, start with 110 grams of coffee. The convenient thing about this brew ratio is you can get 3 full batches out of a 12oz bag of our coffee. That’s more than 3 quarts of cold brew! The grind should be just about the same as you would use to make a large Chemex pot or auto-drip batch. If you’re not quite sure what that looks like check out the reference image below:
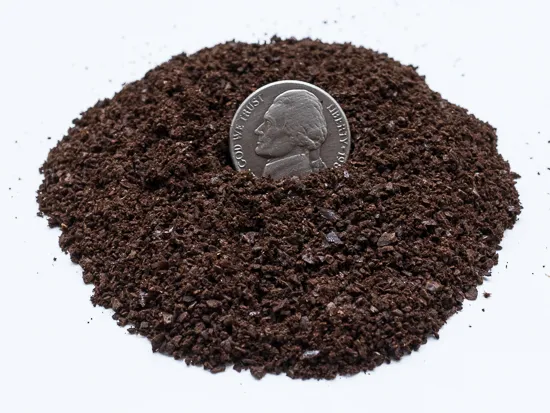
If you can’t get exactly this grind size, don’t panic. You can adjust your brew time to compensate; a finer grind will need less time to brew, and a coarser grind will need more time.
Slowly pour cool, filtered water over grounds.
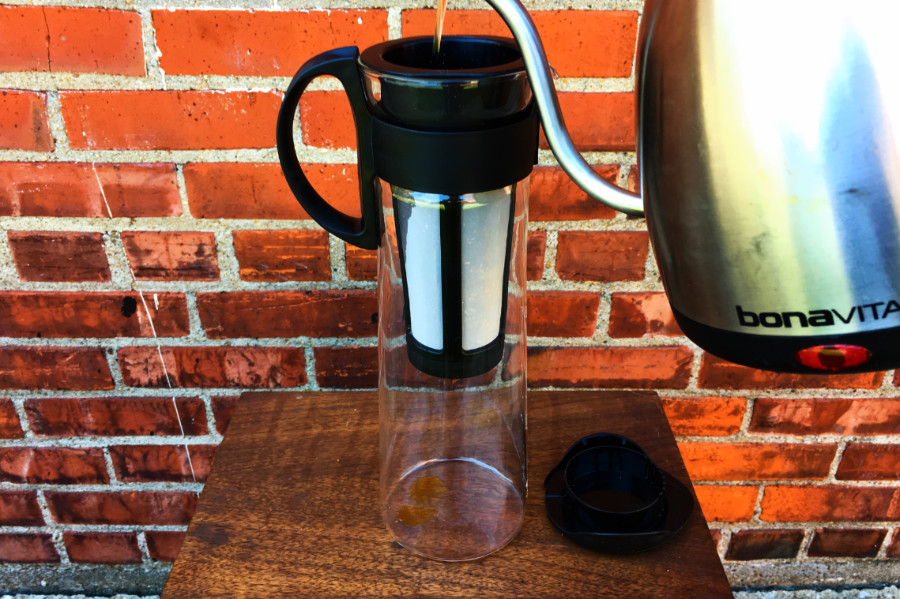
As mentioned in our post about making better coffee at home, using filtered water will give you a much cleaner-tasting cold brew. If you have a kettle for brewing pour-overs, that’s useful for adding water at a nice measured pace. If not, just do your best to add water slowly. The water will filter down through the coffee and drip into the carafe. If you’re short on time, pour directly into the spout to fill the carafe.
Just keep adding until the water level reaches the top “band” where the handle attaches to the carafe. Then put the lid on the carafe.
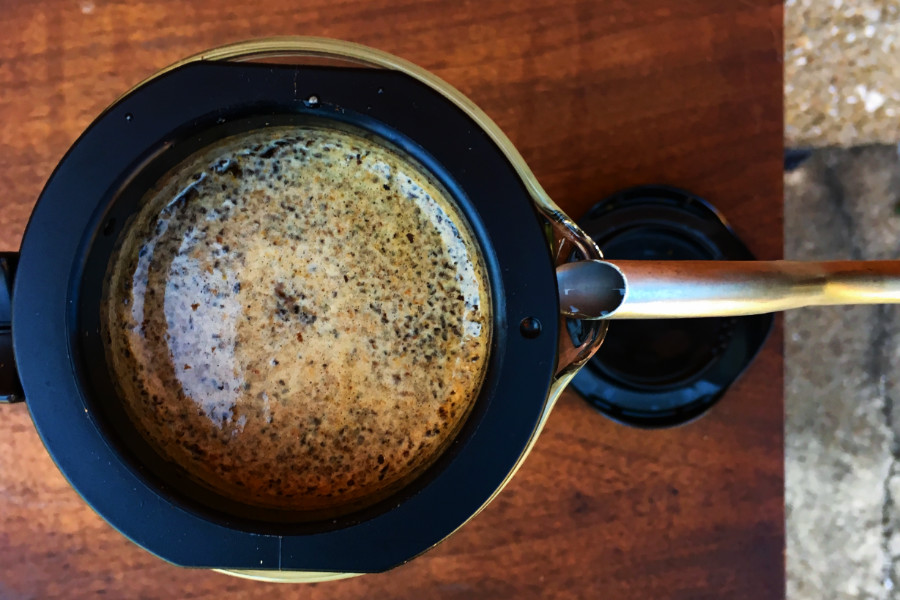
Gently agitate the brew.
Give the carafe a gentle shake. This will help make sure all the ground are saturated with water and give an even extraction. You can also do this again half-way through the brew as an added insurance for a strong brew and even extraction.
Let sit at room temperature for 18 – 24 hours.
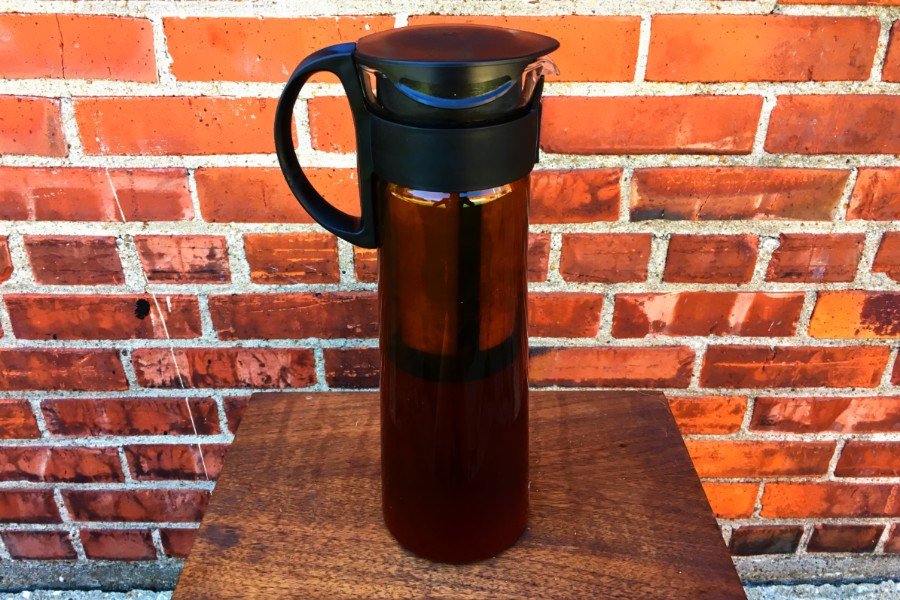
I know we’re technically talking about cold brew here, but the just-above-freezing temps in the fridge tend to produce a sludgy-tasting cold brew in my opinion. As long as your house/office/secret lair isn’t consistently above 75 degrees F, you’ll get a much more lively and vibrant-tasting brew at room temperature. And besides, compared to the 205 degrees needed for a good hot extraction, 75 is pretty cold! Depending on your grind size and taste preference, the brew can go anywhere from 18 to 24 hours. 20 hours was the sweet spot for me, so I started a brew at noon on a Friday, and it was ready to go for breakfast Saturday morning.
Remove the brew chamber and clean.
Once you’ve reached your desired brew strength, all you need to do is pull out the brewing chamber, lid the carafe, and throw it in the fridge or you can serve over ice right away. I recommend cleaning and rinsing the brewing chamber with hot water right away. This will keep it clean longer and free of old coffee residue. Remove the bottom of the chamber for easy rinsing. If the nylon mesh starts to become discolored or has an old coffee odor, you can soak it in a warm solution of Urnex Cleancaf to renew it.
Serve, and enjoy!
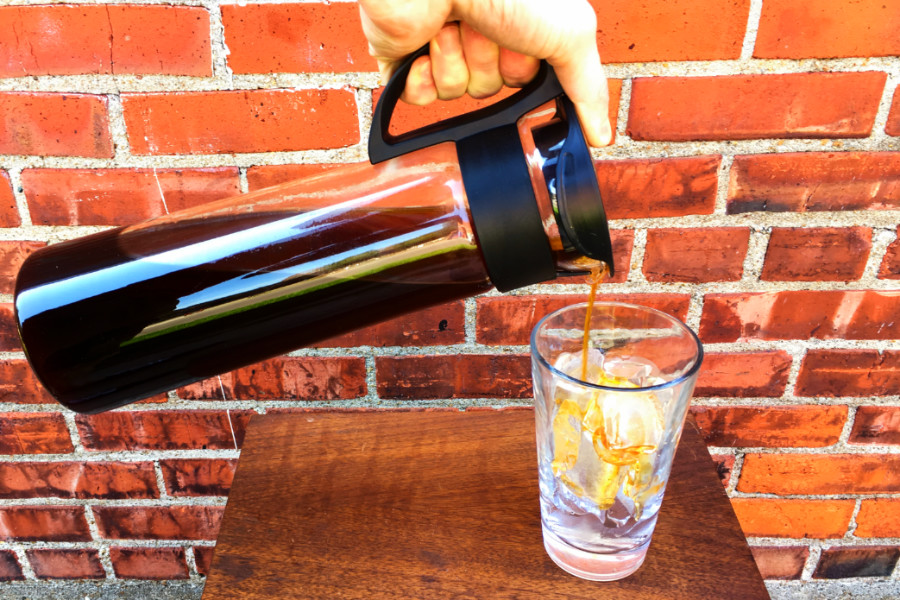
Your brew should be strong enough to serve right away over ice, or throw it in the fridge for a bit and you can drink the stuff straight but watch out! This cold brew may be super refreshing and drinkable -especially if you use a delicious and clean washed coffee from Oddly Correct– but it is strong and will have you buzzing well into the afternoon if you pound glass after glass of the stuff. You can store it in the fridge in the provided carafe for about two days before the coffee starts to oxidize, or transfer to an airtight container in the fridge to prolong its life.
Keep in mind this recipe is a starting point and brews a beverage for my personal preference; a strong but bright and vibrant iced coffee beverage. You can make tweaks to fit your taste preference, or even dose up and grind fine to make a super-strong concentrate, OR get crazy and make a batch with a fine distilled spirit like Mean Mule Blue Agave to produce an insanely delicious coffee liquor!
Overall
All in all, I think the Mizudashi is capable of producing really great-tasting cold brew with minimal hassle, mess and investment. While durability could be an issue, careful handling and washing should give you many batches of crisp refreshing goodness for any time of the year.
Any questions, or have success with a particular coffee or alternative method? Let me know via email at [email protected]
Cheers,
Mike Schroeder
roaster and bicyclist
Oddly Correct
Hacking Your Old Coffee Pot
It doesn’t have to be this way!
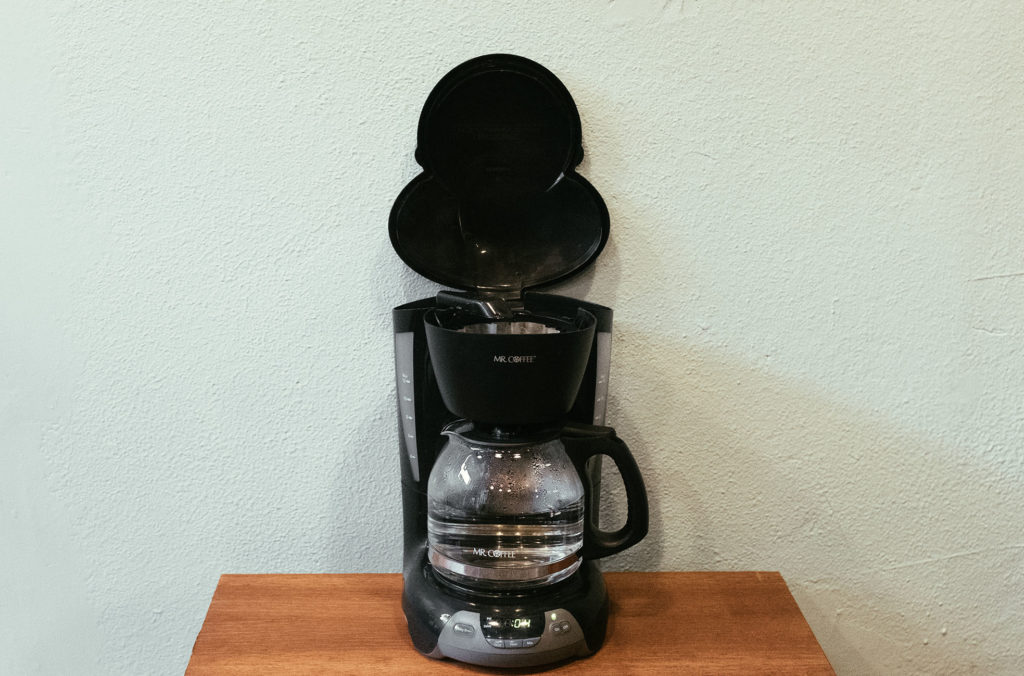
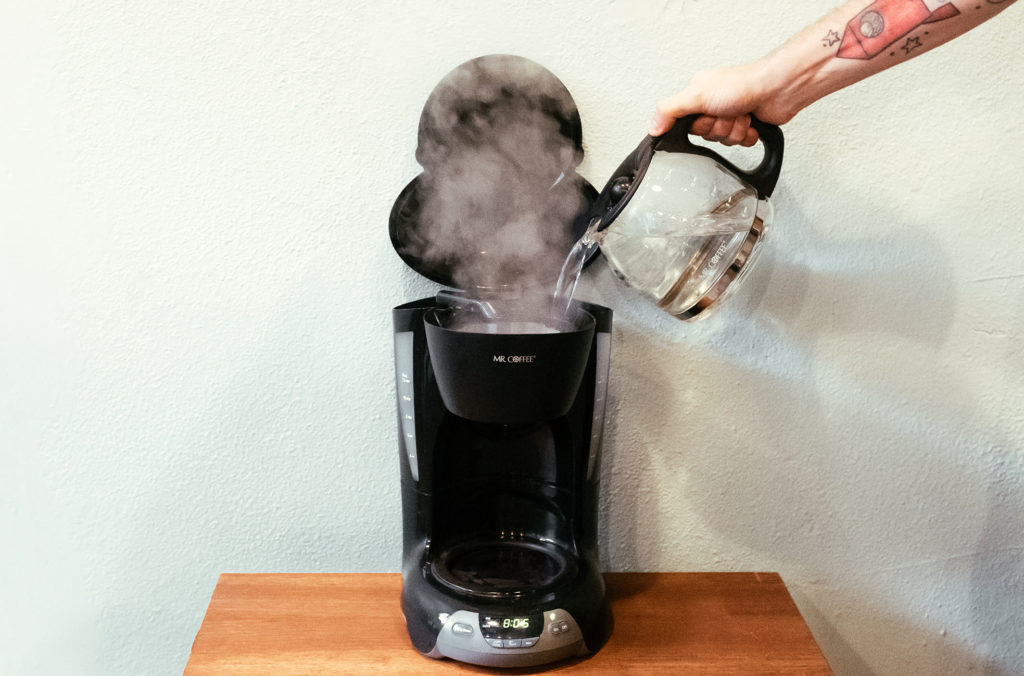
While we may be known for only offering coffee via pour-over (sans cream or sugar at our Main Street shop here in Kansas City, we know that everyone at home may not be in the same situation. In fact, in most homes in the US you’ll probably find one of these:

That’s right, the infamous Mr. Coffee, or maybe you dread going home to visit your parents or relatives and dealing with the swill that can come out of these things. Ether way, chances are you wish the machine sitting on the kitchen counter made coffee that tastes more like what you’ve had in your favorite shop. Well, I’m here to help you get A LOT closer to that with a couple tips to make your old auto-drip coffee pot produce great tasting coffee!
Clean your machine!
Don’t make too much, and use enough coffee.
To get a great tasting brew, you should be shooting for a coffee to water ratio of roughly 1:15. Most auto-drip machines aren’t made to accommodate this at full volume (if you brewed a full 12 “cup” pot with enough grounds, they’d start spilling out over the basket right away!) so its best to only fill to about the 8 cup mark on a standard 12 cup machine. If you have a smaller or larger brewer, use 2/3 full as a rule of thumb.
The “cup” measurement on coffee makers is actually only 6 ounces. So for every cup, you’re going to need about 8.5 grams of coffee. In a standard 12 cup Mr Coffee, I used 70 grams of medium-coarse ground coffee to get a great tasting brew.
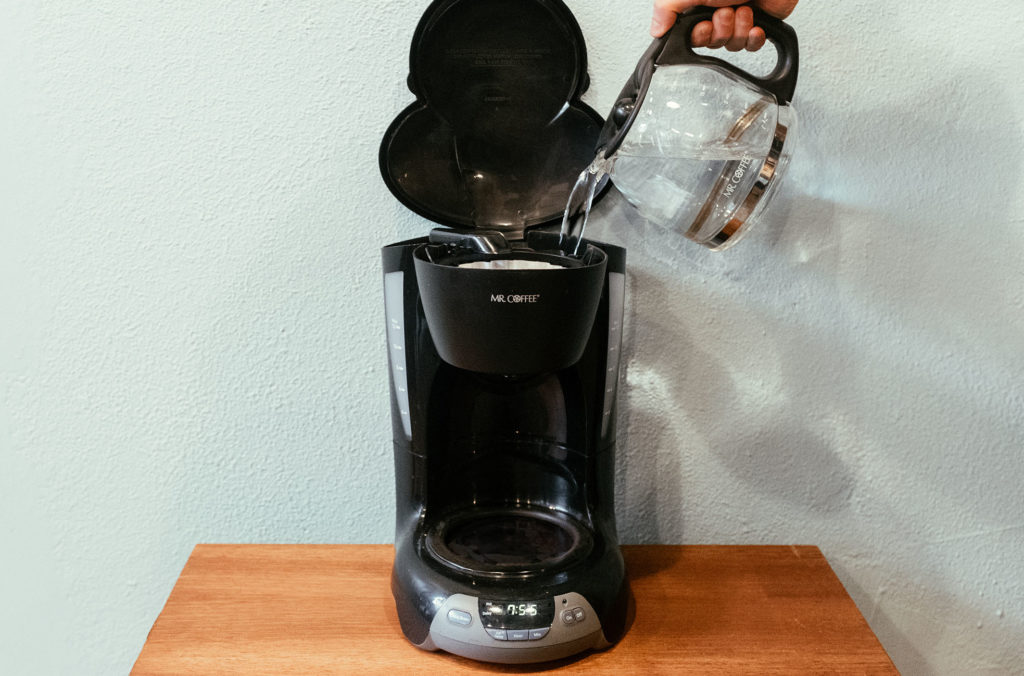
Preheat your water
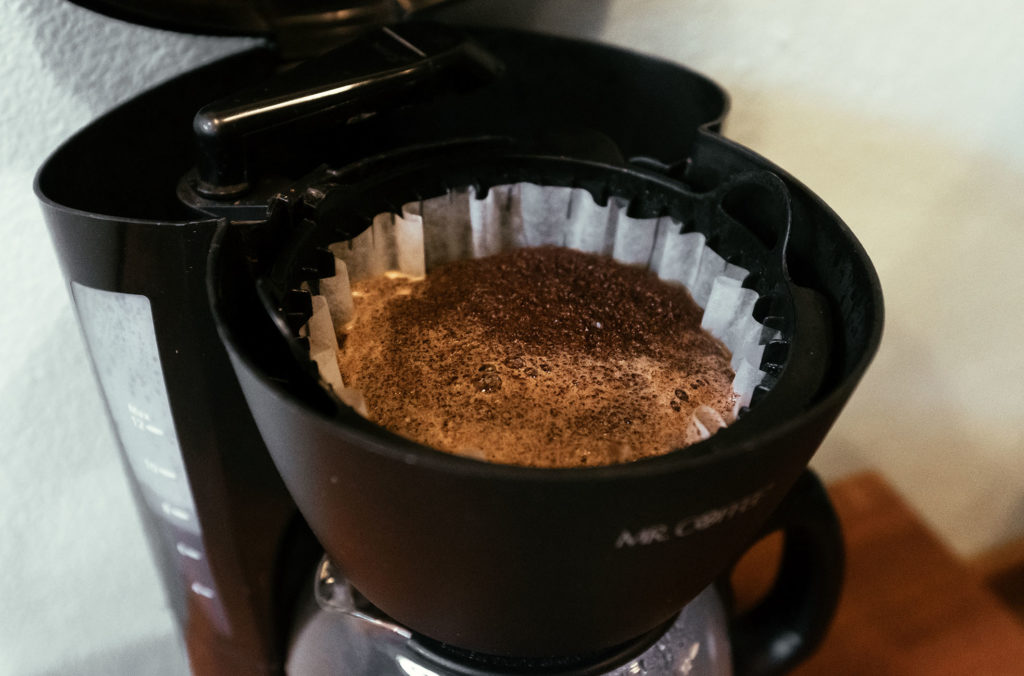
“Bloom” the coffee
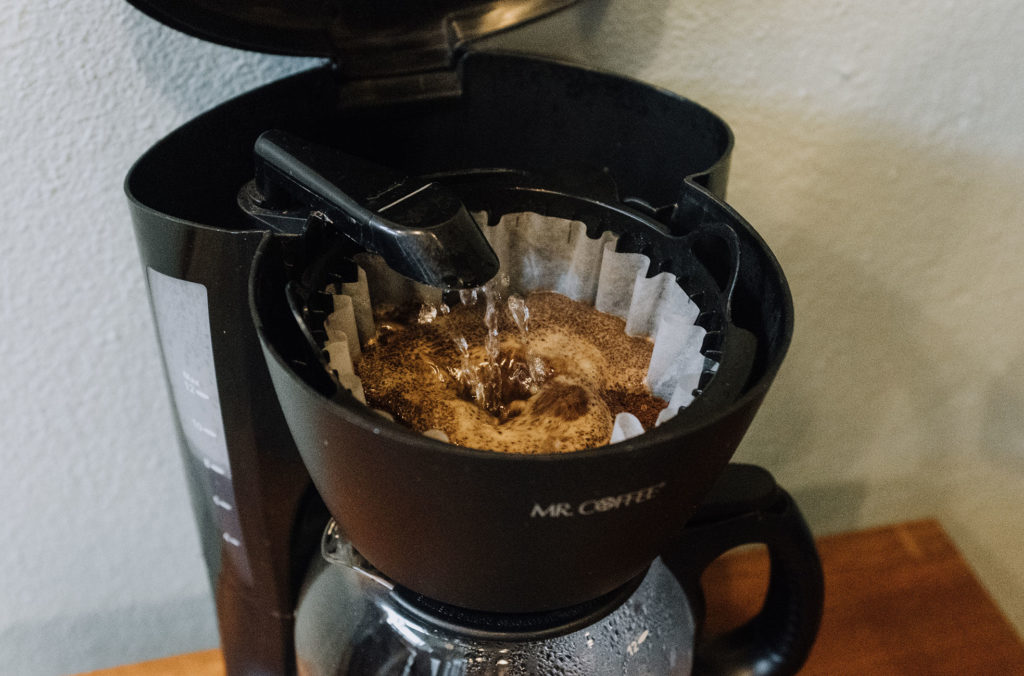
The coffee will puff up as CO2 is released. Turn the brewer off, wait about 20 seconds, and turn it back on to begin your brew. Letting that gas get out of the way will help that fresh coffee get all of its delicious flavors into the cup.
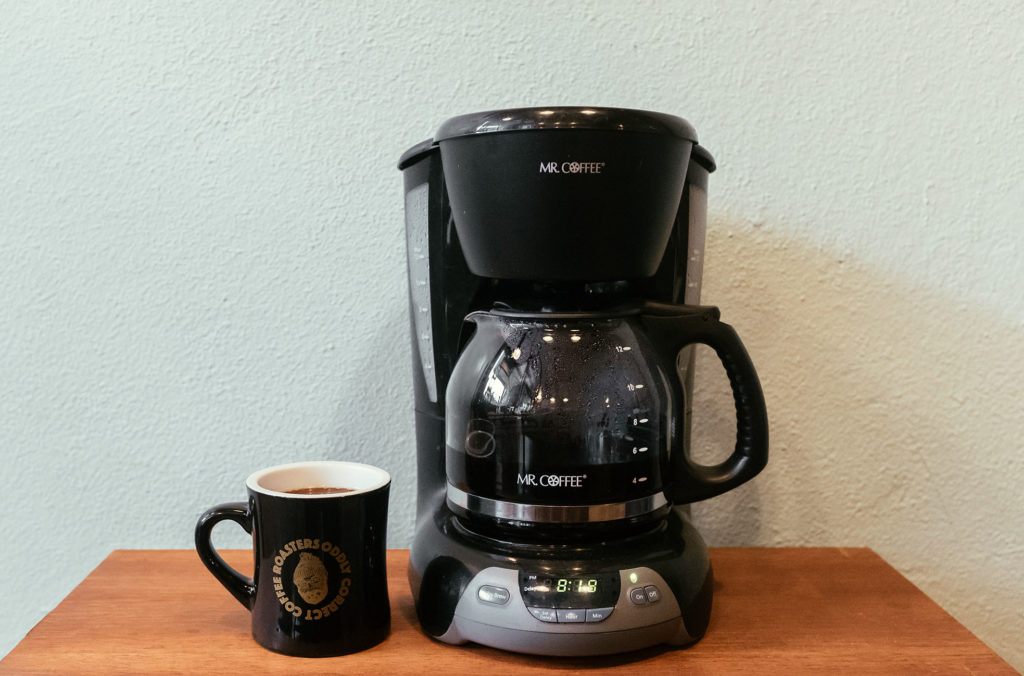
Don’t let it sit.
Most home coffee makers have a hot plate where a glass carafe sits and stays hot as long as you leave it there. While it may be nice to have hot coffee available all morning/day, keeping coffee heated over a long period of time will break down pleasant-tasting acidity into bitter and acrid flavors. Your taste buds will thank you for just making enough to drink right now, or keeping extra in a thermal carafe or thermos until you drink it.
and last but certainly not least…
Use great coffee!
As always, if you have additional questions or need guidance for your brewer, email me anytime and I’ll be happy to help!
Cheers,
Mike Schroeder
roaster
Oddly Correct
[email protected]
Make Better Coffee At Home
As a company, we strive to be a reliable source for mind-opening coffee that anyone can enjoy. A lot of what we focus on has a particular person in mind: people looking to brew great coffee at home. So, we thought we’d leave a couple pointers here that will help improve the quality of anyone’s morning cup. Any one of these steps alone will make your coffee taste better than it does now. Put all of them together, and you’re on your way to freaking out your morning cup, every time.
Use Fresh Coffee
There are two ingredients in a great cup of black coffee. Coffee, and water. Let’s start with the coffee. Coffee is the roasted seed of a cherry-like fruit that’s been cleaned and dried. It is a consumable product. After coffee is roasted, the freshness and flavor will immediately be assaulted by its natural enemies: light, heat, moisture and air. While coffee does need some time after roasting to rest as flavor and body are still developing over the next 12-24 hours, fresher is almost always better for drip coffee.
Look on the grocery store shelves, and many coffees will have a “best before” date on the bag. Examine carefully, and you might find that date to be months, maybe even years in the future. The coffee is of course safe to drink up to that date. But like we said before, its enemies have long been at work degrading the flavor and aroma compounds in the coffee. Oxidation is one of the biggest factors. As oxygen in the air contacts the roasted coffee, it donates electrons to compounds, altering them and changing the perception of flavors and aromas in the coffee. Think about half an avocado in your fridge. After a couple days, that sucker looks brown and is gonna taste funky. Sure there’s no mold or harmful organisms propagating on your avocado, but you know that thing is not gonna make good guac. Well the same thing is happening to your coffee. It may take a little longer, and you might not be able to see it clearly, but your coffee is degrading from the moment it leaves the roasting chamber.
Our general rule of thumb is consuming coffee within two weeks after roasting gives the best flavor; after that the flavor really starts to decline. Here’s where you have to choose your coffee carefully. That “best-by” date doesn’t tell you WHEN your coffee was roasted. We recommend always buying coffee that has a “roasted on” date. This lets you know exactly how old that coffee is
You’ll also benefit from purchasing directly from a coffee roaster you trust. At Oddly Correct, every bag we ship to customers is no more than two days out of the roaster. Coffees on our retail shelves in Kansas City are never more that 10 days old and they’re all in sealed bags with a one-way valve. We want you to have the best experience possible with our coffee, and that means not letting stale and oxidized Oddly Correct reach your cup. A byproduct of buying directly from coffee roasters you know and trust is having a reliable source for high-quality coffee. When you get familiar and comfortable with a roaster’s buying practices, roasting style and general quality level, you can know that you’re going to get a bag that fits your preferences and gives you a better coffee experience every morning.
Use Good Water
Coffee that has been brewed to a good strength is roughly 98.5% water. This means that if your water has off flavors or smells -chlorine, lead, etc-) that is definitely going to show up in your cup of coffee. Your morning cup of coffee will greatly benefit from some sort of filtration. I recommend either adding an in-line filter to your kitchen faucet, or for a more plug-and-play option get a faucet-attaching or pitcher filter to supply your coffee and drinking water -it’s gonna taste better!)
Also, the chemistry of water affects the way flavor and aroma compounds in ground coffee are extracted into the water. In general, the overall mineral content ,often listed as “total hardness” in parts per million or ppm,)and the alkalinity ,a measure of the waters ability to neutralize acids that is often listed as “carbonate hardness” in ppm or “degrees alkalinity”,) are the important factors. Usually, you can find this info from your municipal water source in a yearly water quality report. In general, look for total hardness between 100 – 200 ppm, and alkalinity between 15 – 40 ppm or 1 – 2.5 degrees. I could go into great detail as to how these factors actually change your brewed coffee, but that would be an essay on its own… If your local water source falls above these ranges, you can mix in distilled water to lower the alkalinity and hardness of your water to acceptable levels since distilled water has zero hardness and zero alkalinity, so you can reduce both values by a % by adding that % of distilled water to your own water. But this is getting complicated… In general, filtering your water will be enough to notice a significant improvement in the quality of your morning cup!
Measure
Using the right amount of coffee and water is essential to brewing a good cup. If you’re getting inconsistent cups of coffee at home, my guess is that you’ve been “eyeballing” your grounds or water to brew your coffee. Without measuring these quantities, you will be constantly shooting in the dark for a well-brewed cup of coffee that is a strength you enjoy. While any method of measurement will help you to figure out how to dial in your brew, I highly recommend getting a gram scale to measure both your coffee and your water. There are inexpensive and accurate models on Amazon-I’ve had mine at home for several years- or you can find many others that are more aesthetically pleasing. Once you can measure your coffee and water, here’s a good starting point: one gram of coffee for every 15 grams of water (about 2 grams coffee for every fl oz of water.) From there you can change that ratio to fit your preference.
Get A Good Grinder
Once you’ve got your hands on some fresh, kick-ass coffee, you need to grind it before you can get all that flavor into your morning cup. If you’ve been grinding your coffee where you purchase it, stop! Grinding coffee exponentially increases the surface area in contact with all the elements that stale and oxidize coffee, thus exponentially increasing the speed with which that process happens. So, get a grinder you can use at home!
Here’s where the qualifier “good” comes into play. All coffee grinders are not created equal. There are two basic types: blade grinders, and burr grinders. You’re probably familiar with blade grinders. Two whirling metal blades that spin at high rpms to break up your coffee. While cheap and simple to operate, blade grinders have a major flaw. Unless you’re planning on completely pulverizing your coffee into a powdery substance, you have no real control over how coarse/fine the coffee is ground and the blades chop the coffee into many different size particles. Not only does this make it hard for you to replicate a particular grinding situation, but it leads to uneven brewing from all the varying particle sizes. Without getting into too much scientific lingo, inconsistent particle size means inconsistent surface area in contact with your hot water, which leads to over-extracted AND under-extracted flavors in your cup.
In contrast, burr grinders use either sharp flat disc or conical “burrs” to cut and mash the coffee to a specific size determined by the distance between the burrs. So, you have control over the fine-ness of the grind, and greater consistency. This makes for better tasting cups and a more repeatable process. You will pay more for a good burr grinder -any costing less than $65 or so may not be actual sharpened burrs-) but there are many options available. I recommend the Baratza Encore, or Bodum Bistro as great everyday workhorses. You can also get hand-crank burr grinders for not much money at all, but you just have to be willing to invest your time and energy…grinding even 25 grams of coffee takes a couple minutes and quite a few turns on the crank. If you really want to step it up, there are even models that weigh your coffee for you…
Enjoy Your Coffee
This one is a bit of mind-over-matter, but effective nonetheless!
You can be following all the above advice, but if you’re blasting through your morning cup to get the caffeine fix, chances are you are not really going to enjoy your coffee or the attached morning ritual)all that much. We recommend slowing down and brewing your coffee yourself. Any pour over method of brewing is great at forcing you to take a few minutes and enjoy your process, and most are available at a minimal cost. My favorite is the stainless steel Kalita Wave dripper. Durable, versatile and forgiving.
Do you have a favorite mug? If not, find one. And make sure it isn’t a travel mug. Nothing sucks the enjoyment out of a great cup of coffee like drinking it in traffic. Get your hands on a nice, heavy ceramic mug or enamel cup and sit with your brew. Drink till it is gone. Then get to work. Everything in life is better when you aren’t just trying to move on to the next thing. Coffee is no exception. That’s also why we have art on our coffee bags. It’s another way to engage you in the morning, and hopefully help you take pause and spend time with the coffee. Think of it like the back of the breakfast cereal box, but for grown-ups…
Ask Questions
There’s a lot of information here, and I’m just scratching the surface. So as you’re pursuing better coffee at home, don’t be afraid to ask questions. Contact us with any questions or problems you run into, ask a barista at your local shop, or do some searching online. There’s lots of knowledge out there, but following any of these 6 pieces of advice will positively affect your morning brews.